How To Compress Image Using Photoshop
Explains all the steps required to compress the image using Photoshop.
In this tutorial, we will discuss the steps required to compress an image using Photoshop. We will be using the photo Body Of Water by Pok Rie for demonstration purpose.
Step 1 - Download & Open the Image
Download the large sized photo and open in Photoshop. It looks like the one shown in Fig 1. The original size of the image is 4.03 MB.
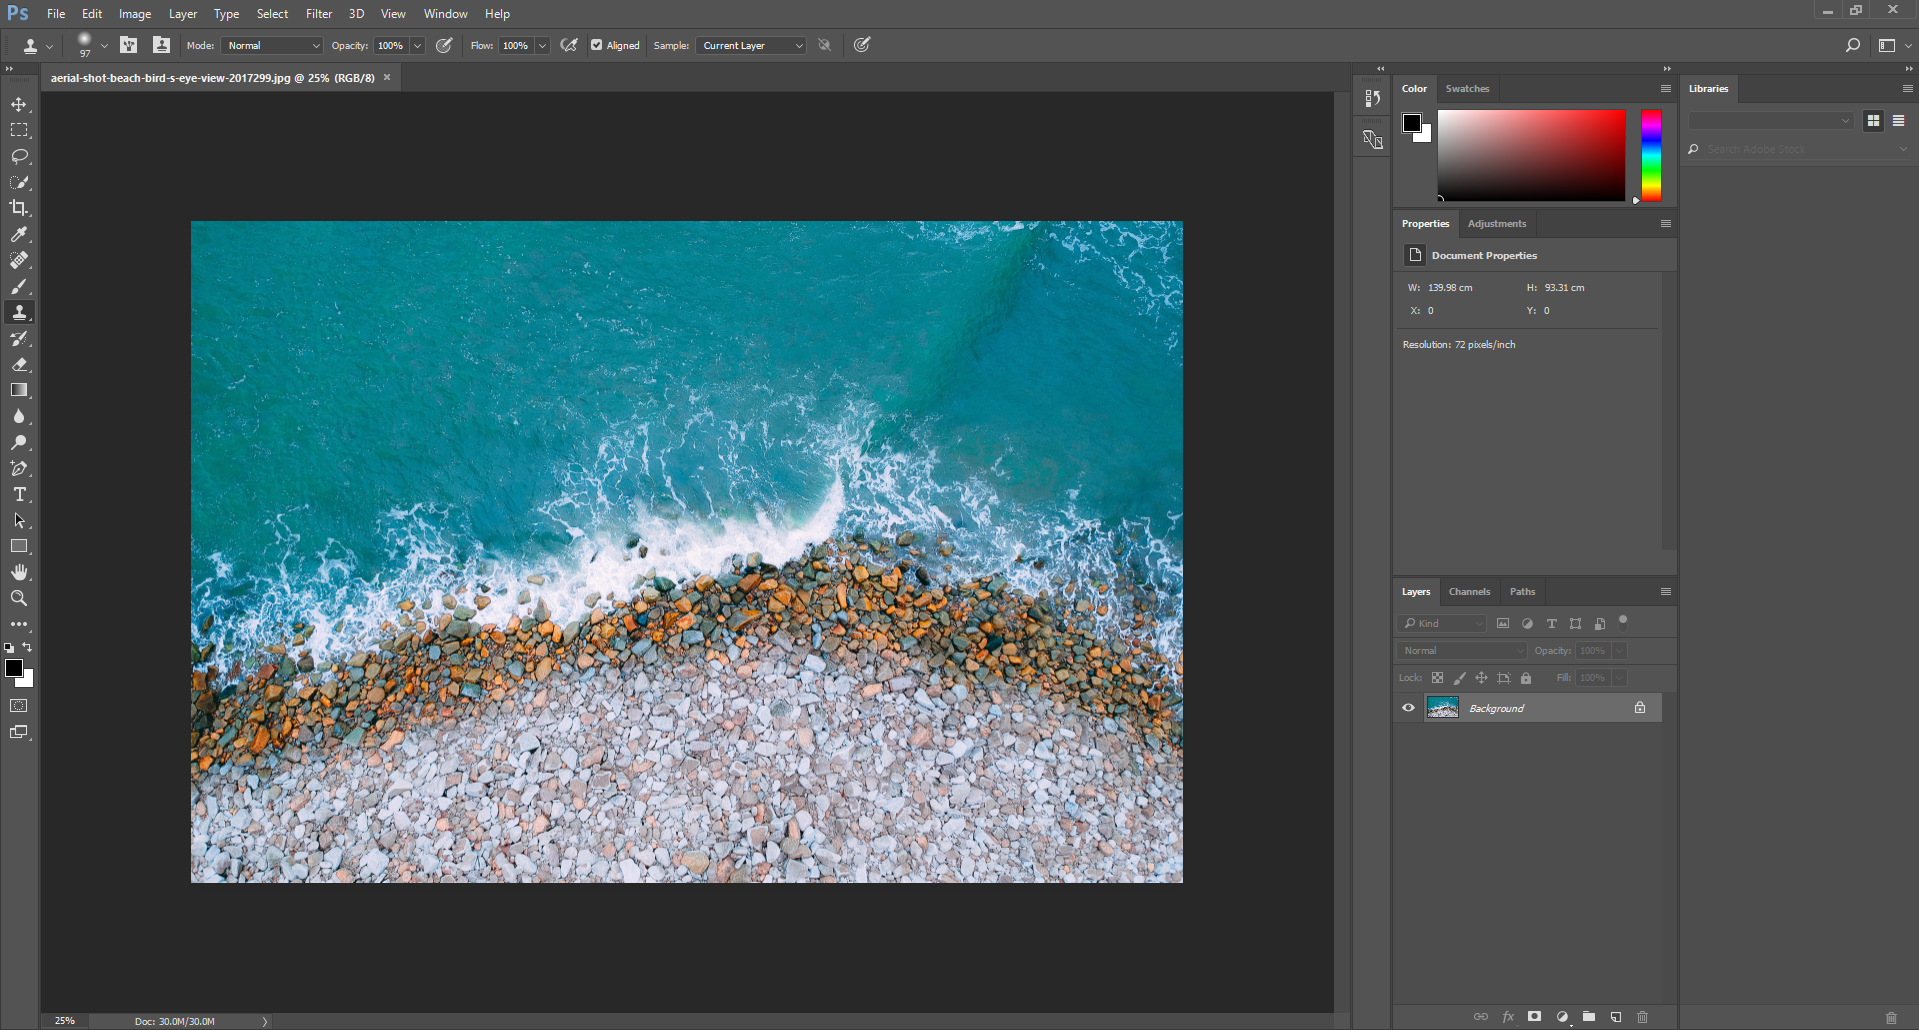
Fig 1
Step 2 - Resize the Image
Since we have downloaded the maximum sized image, we can resize it to our requirements. To do so, either press Ctrl + Alt + I or click on Image -> Image Size. It will show the dialog to resize the image as shown in Fig 2. I have changed the width to 1280 pixels. The height will be changed accordingly maintaining the aspect ratio.
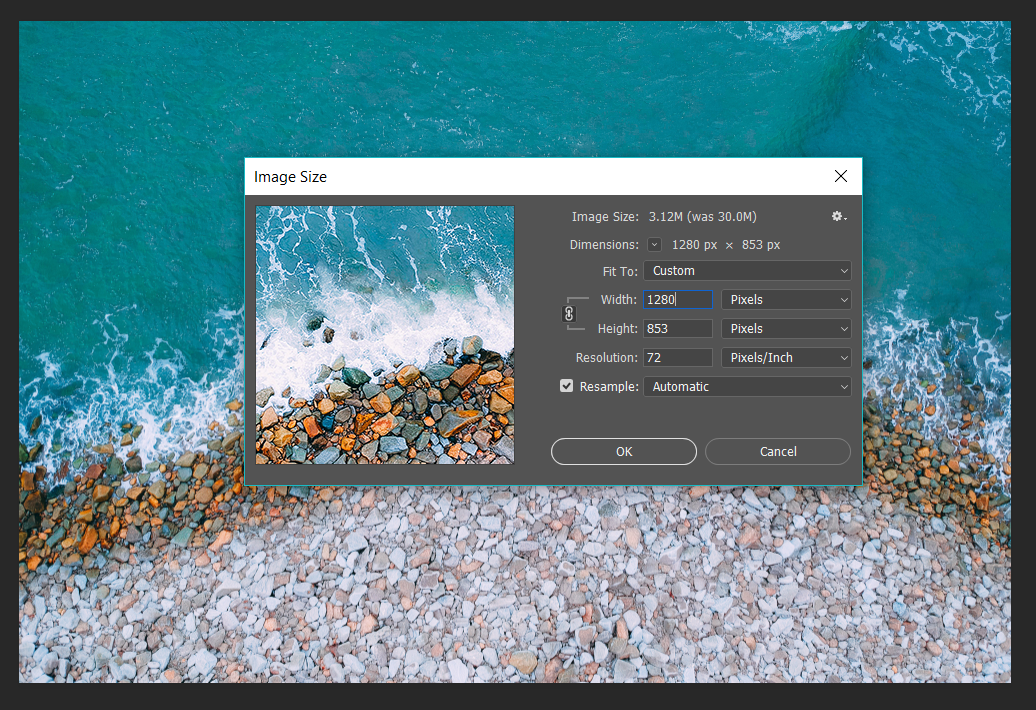
Fig 2
The image size will also change accordingly. The more the pixels, the more is the size and vice versa. Resize the image according to the actual scenario, since images with smaller dimensions take less space on disk.
Step 3 - Compress the Image
We can further optimize the image by using an appropriate compression technique. Save the image in JPEG format, in case it has to be used for the website.
To save the image as JPEG, click on File -> Save As and choose JPEG as the option. JPEG 2000 is another option to save the file maintaining good quality with low size. Keep the quality either high or medium as shown in Fig 3.
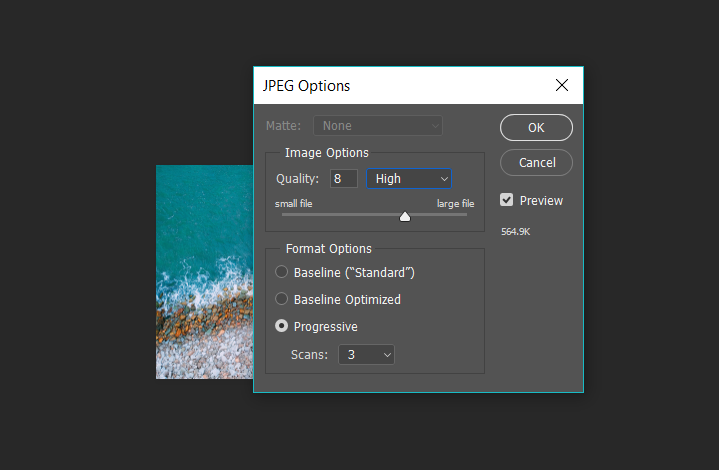
Fig 3
Saving 1280 pixels wide, medium size with quality 5 brings down the size to 363 kB from the original size of 4.03 MB. It can be further reduced by lowering the quality, but the image degrade can be clearly observed with low quality.


